Carving a Guitar Neck with Facets
Many guitar makers and guitar factories “roll” their necks. This means that they roll the shaft of the guitar neck along a sanding belt in order to achieve a round and tapered profile. I like to carve my necks with aggressive rasps and files. This is a very rewarding process. It is a visual process and tactile process. As the neck comes into shape, my strokes and movements are more “in the round” (similar to rolling over a moving sanding belt) but rolling the tool or sanding pad over the neck.
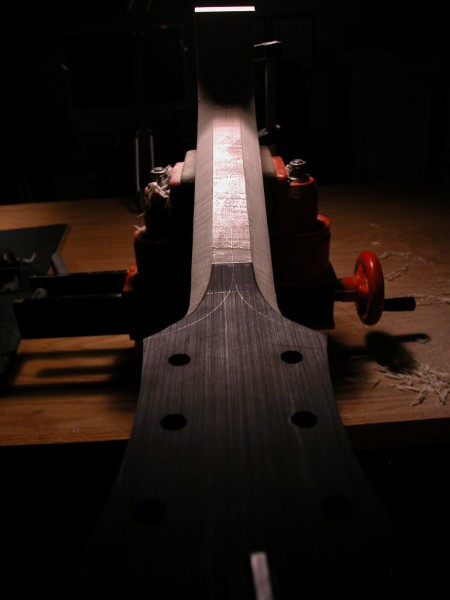
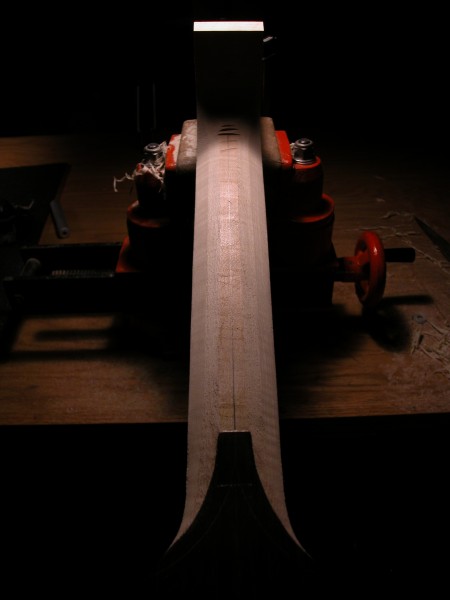
I have my neck mounted in a cradle that supports the neck the entire length and allows me to carve all the way to the edge of the fingerboard and a bit further. After the neck is thicknessed to the proper taper, I begin to shape the primary facets, the entire length of the neck. Facets allow you to easily monitor the straightness of the neck, making sure not to have high spots and low spots. When carving the initial facets, I aim to keep all the facets equal, tapering in width as the neck tapers.
After the primary facets, the secondary facets are filed. Again, I aim to keep the facets equal. This is important when you use different neck thickneses and widths because it will alter the size of your facets. Also, carving the neck this way allows for more control over the profile of your neck. I knock all the corners off while continueing to keep the faces equal. When this is done, the circular shape of the neck begins to show itself and if your facets were straight, your neck will be too.
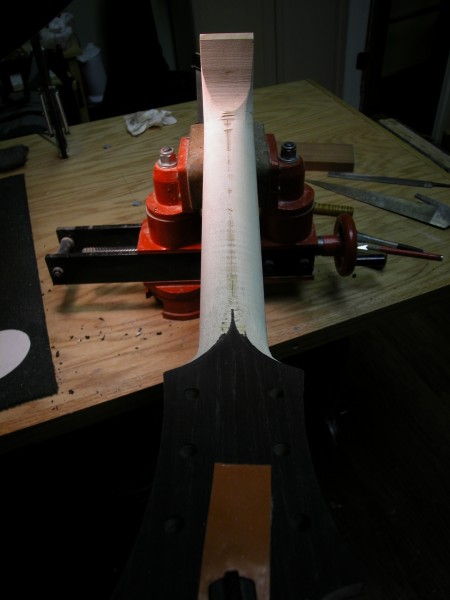
The corners of all the facets, when removed, will more or less be the semi-finished shape of your neck. The edges can be quickly taken away by an aggressive rasp and then a sanding paddle is used to roll the neck. I roll the neck arcross and over on both sides, pulling the circle into the sides of the fingerboard. I also use a block and roll it laterally, from nut to heal, to help maintain straightness.
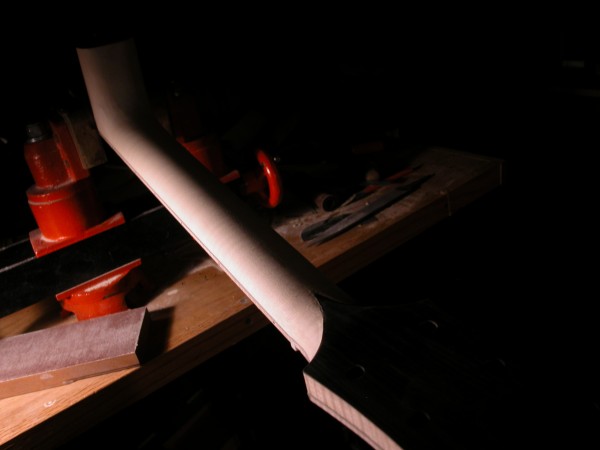
As the shape of the neck comes closer I, begin to bring the headstock transition and heel into shape, using facets and blending them in to the neck shaft. Some luthiers blend the heel into the shaft simultaneously, sometimes I do this, but the radiuses used in my archtop heels are vastly different. Light and shadows during this process are your best friends. Working under a light that can roll across your neck and cast a straight shadow is one of the best ways to look at its profile. I find that taking the neck off the cradle and rolling it against a fluorescent ceiling light works really well to. With the latter, you can watch the highlighted edge roll as you rotate the neck.


Your guitars are beautiful. Have you ever thought of leaving a neck faceted? Just think how ones fingers would feel their orientation.
Thanks John! Fingers and hands tend to like round surfaces:) It would be different though!
I would like to spend a day or two hanging out in your shop. I build instruments strictly as a hobby and have not inspiration for greatness. Since I don’t play golf (in retirement) or fish, I find guitar building rewarding and relaxing. I have reached a point or wall in my skills that has left me frustrated and burnt out so to speak. I would be happy to pay you and promise not to get in the way or ask stupid questions. Your consideration would be greatly appreciated.
I have a large plank of figured cuban mahogany that would make a beautiful guitar but I don’t want do disrespect the wood by trying to create an instrument. This is a rare wood and not found any more, maybe we could work out a barter arrangement.
Jim Bham, Al
Hi Jim, Thanks for the comment! Currently I am not taking on any help at the moment. There is a tremendous amount of information available these days to get started in the world of instrument making. As long as you have the passion for it, you can do it. I would be open to have you visit my shop anytime and I would be happy to talk with you. If you are ever in the LA area please feel free to give me a ring. All the best to you! Just dive in and start doing it and embrace your mistakes:)
–Danny
I use this same technique. The question I have is how do you handle different neck thicknesses? for example, let’s say you have a neck that is, in total, 1 inch thick. If you,just draw the lines for the facet, you will get the roundover, but your neck thickness will always be about 1 inch. This is what I currently do. Now, I’d like to actually have the neck thickness different. Let’s say .800″ at the first fret and .850″ at the 12th fret. How would you deal with this? I guess there are two options: (1) get the neck to,the right thickness and then start the faceting process or (2) facet the neck and then sand down to thickness. Any tips? Thanks.
Thanks for the question Clifton! The best way is to achieve your desired thickness taper first and then mark the centerline. You’ll always want to keep this line because if you sand through it you’re beneath your measurement. As far as the facets go, they taper from wide to narrow. Even if you had a constant neck thickness the profile would still taper because of the difference in fingerboard width from octave to nut. This taper alters the neck profile. Draw your profiles out in 2D to figure out the size of your primary and secondary facets. Once that’s done all you have to do is connect the dots. All the best!