Constructing an Oval Hole Rosette on a Koentopp Chicagoan
Constructing rosettes is one of the most enjoyable processes of making a guitar. It is a design aspect that the guitar maker can stamp with their creativity. An archtop rosette follows the same principle as a traditional Spanish rosette with the same purpose of design and function. One can say that an archtop rosette is a little more challenging because the actual ring is fit to a complex surface of the top arch as apposed to the flat surface of a classical guitar. In my mind, they both have distinct challenges but when the process is understood it is easier to create what your eyes want to see.
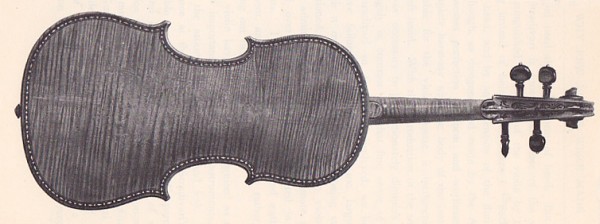
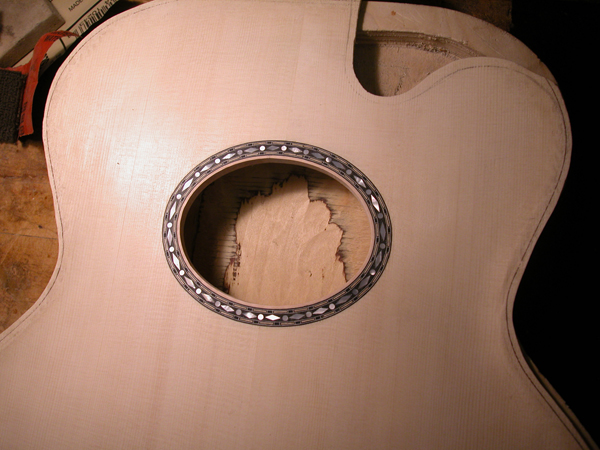
I took some photos of a Chicagoan Oval hole guitar that I worked on in the past with an elaborate rosette constructed with a handmade latter pattern and an inlay inspired by the quartet of instruments made by Stradivari for Philip IV, the King of Spain, in 1696.
Before I started I wanted to keep in mind three elements, circular motion, a change in visual appearance at different viewing distances, and a unification of design to the whole instrument. These elements are perhaps more prominent in the rosette of a well executed classical guitar, but were still the core of my design process.
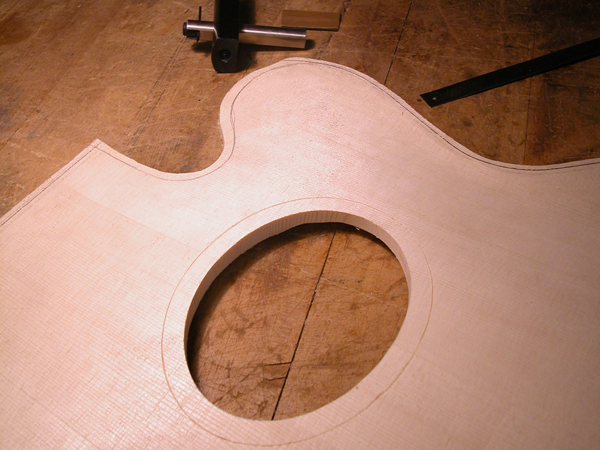
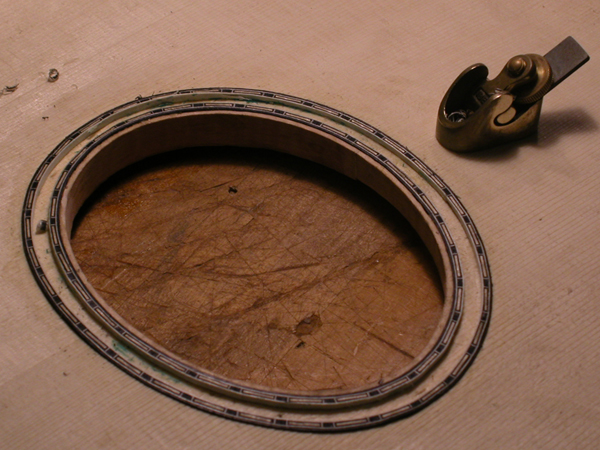
The first step, after the sound hole was cut out of my top plate, was to scribe a line around the rosette to mark the outer wall of my rosette ring. This was easy to do by hand with a marking scribe set to the right distance and a very sharp blade positioned so that the bevels of the blade compress the wood fibers on the inside of the channel. Set only enough to scratch the surface at first, the blade depth was increased until I reached the right depth.
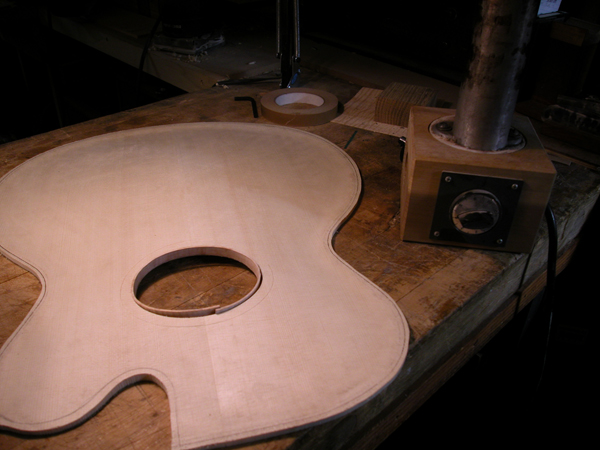
I then bent a strip of maple that would fit around the hole and overlap itself so that I could fit it tight with a nice mitered joint that would not draw your eye when finished. Before I glued it, I dry fit it, and shaped it to the complex shape of the arch so that I would have an easier time gluing and fitting. I dry fit it with it being a hair long so that when I glued it I could simply shave the surface of the joint down to get a perfect fit. I used tape to glue it around the hole.
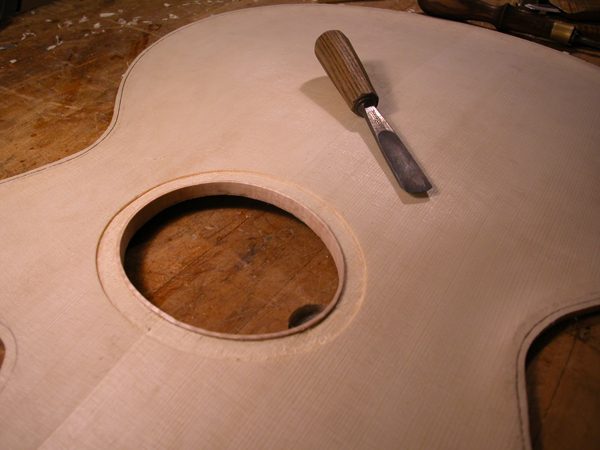
The easiest way to cut out the material inside the channel was to use a very sharp shallow gouge and chip it out towards the inner and outer edges. This is easy if the outer reference ring is already cut. The bottom doesn’t need to be dead flat but the cleaner the better.
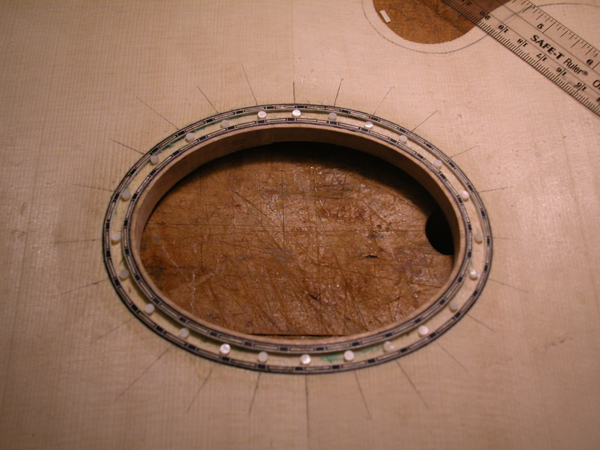
I then fit two latter pattern-purfling strips around the inside and outside edge. I made these strips to go around the whole guitar body and continued the motif in the rosette. When fit around the ring this pattern has a nice oscillating affect that makes the pattern “move”. I used Titebond here and simply wrapped them around. They stayed tight and I simply tacked the joint together with super glue. There is no need for pins or tape to clamp them.
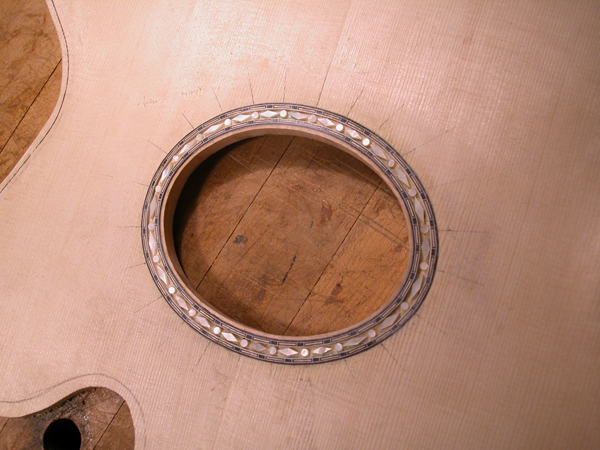
I should have laid out the radial lines before I cut the hole but I had done so without. So I radiated lines out carefully from the measured center and drop fit the pearl dots in place. I radiated the lines this way so that my diamonds would get longer as they went around the ellipse. This was done to help create motion around the hole and create a more dynamic affect. After the dots were glued with a little superglue I cut all the diamonds and fit them in place.
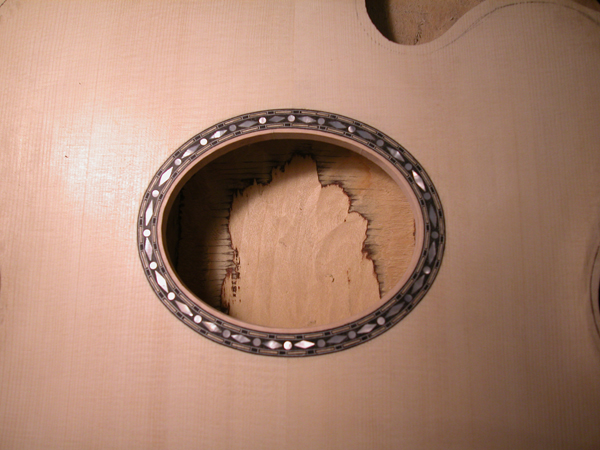
The last step was to fill the inlay field with some epoxy mixed with ebony dust. I decided to go this route because I had read some other articles where makers were having problems with the black stain moving into the lighter spruce. I probably would have been okay with latter pattern already installed.
The hardest part was leveling the whole inlay down to the surface of my arching. The inlay and epoxy are much harder than the spruce of the top so some care is required to get the inlay to follow the surface arching in a beautiful way.
The overall rosette followed the overall aesthetic of the guitar and created a visual center point that has purpose and style.
Tags: Constructing oval hole rossette, custom archtop, diamond inlay, inlay, Koentopp Chicagoan, making a rosette, oval hole, rosette
Beautiful work, Dan. Rosettes are my bane. I’m still fighting with the round ones!
Thanks Karl!
thank you for your oval rosette information, I am repairing an employee made ? J 65 M Martin guitar
with an oval hole and rosette. the problem is that the oval was put in off center by about 4mm
and I can widen the oval hole to correct that and reroute the rosette channel but I would have had to add little pieces of matching spruce to recreate the little 1/8 inch spruce border along the edge
of the sound hole. your example of adding a little maple ring around the inside of the hole make this repair ten times easier and your rosette is beautiful to boot. although I do not know if I will do one that is quite as fancy. thanks for putting out this information, I for one really appreciate it. thanks again Paul
Thanks for the comment Paul. I am glad that you got something useful out of it! Sounds like an interesting repair. Good luck with it and let me know how it comes out. Thanks again!
Dan, Great job,,, Making the difficult a little easier.
Thank you so much Frank! I really appreciate the comment!
Your finished product looks great, I’ll have go at one
Thanks for the inspiration
Graham
Thanks so much Graham! I greatly appreciate it.
hello I have a question,Ive always wondered how to come up with a nice looking oval sound hole. Im terrible at math. Is there a math formula ? how do you design a good looking oval,maybe you know of a link ?? thanks for your time greg
Hi Greg, I would sketch up some ovals in a drawing program so that you can control the parameters of the oval. Print and cut them out and see how they look to you. When you construct everything from the ground up with math, perhaps some numbers will work out better than others and you’ll see the same relationships reappear;) -DK
Very timely.im starting an adventure,,to build a harp guitar,and oval sound holes have been something ive wanted to include.thanks for posting your methods.gregm
Best of luck to you! Thanks for your comment!